Let’s take a simple scenario: you have two UIViewControllers within a UINavigationController and you want the transition between them, in both directions, to be a fade-in effect rather than the usual slide-in/out effect.
There’s a lot of bad examples out there of how to do this. If you see anything suggesting you should call UIView.animateWithDuration inside a custom UIStoryboardSegue class, stop right there, and be glad you read this post.
Unfortunately even Apple’s documentation implies that you should do this, but it just hasn’t been updated to the more powerful approach introduced in iOS 7.
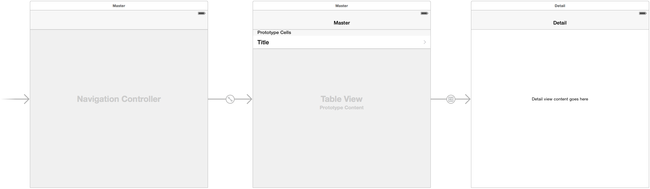
I’m going to show you the right way. It takes a few minutes longer to get your head around it, but once you do, you’ll have a lot more power for your custom transitions. You can follow along using the Xcode Master-Detail Application template.
Segues vs Transitions
I’m going to divide the responsibility of transitioning from one view to another between two classes, in much the same way that we divide the management of the rest of the UI between the model, view, and controller classes.
Think of UIStoryboardSegue as changing the model of the view. It’s job is just to call methods on the view controllers like presentViewController, and dismissViewController. If you want animations, even custom ones, call with animated: true.
The class responsible for changing the views are animator classes, which conform to the UIViewControllerAnimatedTransitioning protocol. These classes are the ones that call UIView.animateWithDuration.
Custom animator
In our example we’re not changing any of the model behaviors, we’re still using ‘pushViewController’ and 'popViewController’. This means that the default 'Show’ segue will do the right thing, as will the built-in exit segue that handles going back.
So we don’t need to write a custom segue class at all! What we want to write instead is a custom animator.
class FadeInAnimator: NSObject,
    UIViewControllerAnimatedTransitioning {
We have to provide two methods, the first simply returns the duration of the transition. We’ll just use 0.35s which is the typical length of most Apple-provided transitions.
func transitionDuration(
    transitionContext: UIViewControllerContextTransitioning
    ) -> NSTimeInterval {
        return 0.35
}
And now we write the animation.
This class provides us with a view to contain the animation, as well as the source and destination view controllers of the transition. Our job is to add the destination view to the container, set its initial state, and then animate the transition to the final state. Once done we complete the transition.
func animateTransition(
  transitionContext: UIViewControllerContextTransitioning) {
    let containerView = transitionContext.containerView()
    let fromVC = transitionContext.viewControllerForKey(
        UITransitionContextFromViewControllerKey)
    let toVC = transitionContext.viewControllerForKey(
        UITransitionContextToViewControllerKey)

    containerView.addSubview(toVC!.view)
    toVC!.view.alpha = 0.0

    let duration = transitionDuration(transitionContext)
    UIView.animateWithDuration(duration, animations: {
        toVC!.view.alpha = 1.0
    }, completion: { finished in
        let cancelled = transitionContext.transitionWasCancelled()
        transitionContext.completeTransition(!cancelled)
    })
}
That’s all we need for the transition. In terms of content it’s not dissimilar to what you were probably going to write in a custom segue class anyway, except it’s cleaner because it’s not changing the model, just animating the change.
}
Using the animator
Animators aren’t used by attaching them to segue objects. Instead animators are selected by you, based on the view controller pairs, operation, etc.
This gives you a great deal of power because you can example the state of the view controllers, pick different animators depending on states, etc.
You’ll need a UINavigationControllerDelegate class to do this selection, along with the method to do the actual selection. I’m just being quick and dirty here and using FadeInAnimator for all transitions within any navigation controller with this delegate attached.
class NavigationControllerDelegate: NSObject,
    UINavigationControllerDelegate {

    func navigationController(
        navigationController: UINavigationController,
        animationControllerForOperation operation:
            UINavigationControllerOperation,
        fromViewController fromVC: UIViewController,
        toViewController toVC: UIViewController
        ) -> UIViewControllerAnimatedTransitioning? {

        return FadeInAnimator()
    }
}
If you want the default transitions, just return nil.
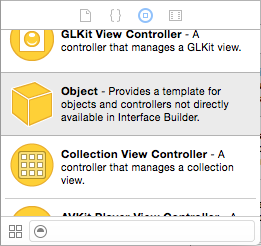
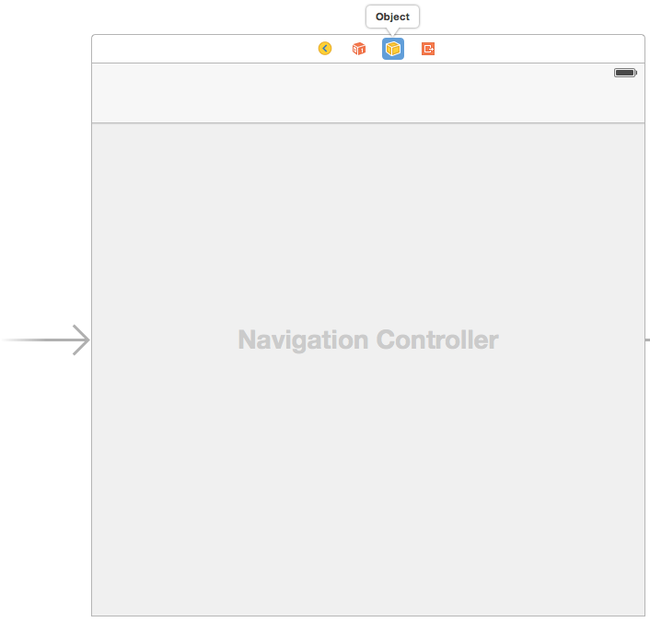
We can instantiate and attach this delegate to the navigation controller using the storyboard editor. First locate the Object entry in the Object library:
Drag one into the bar at the top of the navigation controller that already contains the navigation controller object, first responder, etc. and drop it there.
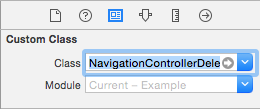
Then in the identity inspector set the Class to the one you just wrote, and make sure that the Module is automatically updated to Current, otherwise you’ll hit a runtime error later.
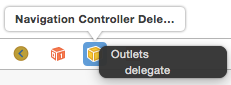
Finally Control-drag from the navigation controller object (the left-most one) onto your new delegate object, and then select delegate from the pop-up menu to set the outlet.
If you test this out, you’ll see that both the animation into, and the animation out of, the detail view now use your fade animator rather then the default slide.
Unwind and exit segues
If you’ve ever needed to use unwind or exit segues, you probably hit a problem where it seemed like you had to override the segue object in an unusual place, perhaps even by subclassing UINavigationController itself.
By keeping the animator separate you don’t need to do this at all.
Create the unwind/exit segue as normal by creating an empty IBAction in the destination view, and then control-dragging from the source view to the destination view’s exit object and selecting the action you just created.
And that’s it!
The default unwind segue class uses something like popToViewController, so it’s already making the model change that we need. Your delegate function to select the animator is called, and you can return something special if you like.
When to custom segue
So why create custom segues at all?
A good example is when you’ve ended up with a view controller with elements that are hidden and unhidden depending on the state of the model.
These can be split out, and each sub-state given its own view controller. This makes it much easier to handle constraints, layouts, and other such things. If you’re worried about the logic in the view controller class, you probably have too much there anyway, and it’s a good chance to clean up.
But you don’t want all these sub-states piling up on the navigation controller stack, they should all feel like the same view controller to the user. So we create a custom segue that replaces the top view controller on the stack.
Something like this:
class ReplaceTopSegue: UIStoryboardSegue {
    override func perform() {
        let fromVC = sourceViewController as! UIViewController
        let toVC = destinationViewController as! UIViewController

        var vcs = fromVC.navigationController?.viewControllers
        vcs.removeLast()
        vcs.append(toVC)

        fromVC.navigationController?.setViewControllers(vcs,
            animated: true)
    }
}
Now we draw our relationships between the view controllers and set the custom segue class. A cute trick is to remember that segue names aren’t unique to the storyboard, just to the source view controller. So we can use the same segue name between different sub-state view controllers if it represents the same transition.
Again note that we didn’t put any animations in that segue, to animate the transitions between the sub-classes, we just create a custom animator. Only one is needed since it can examine which specific view controllers it’s operating on, and adjust its behavior appropriately.